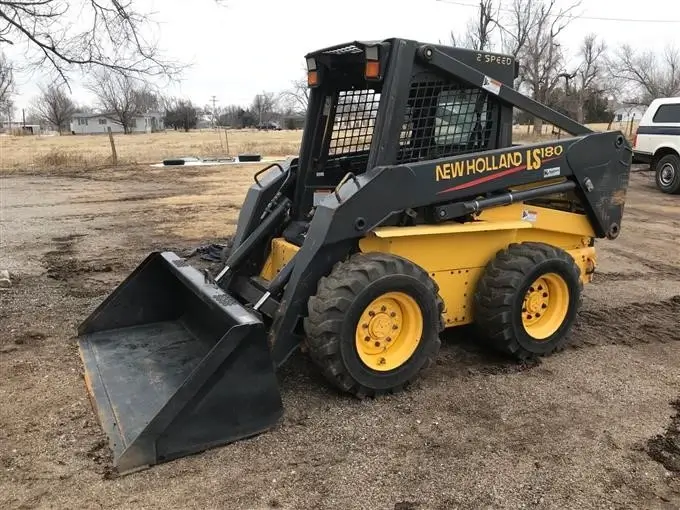
The New Holland LS180, a sturdy and reliable skid steer loader, has earned its reputation as a workhorse in various industries. Known for its versatility and efficiency, this compact equipment plays a pivotal role in construction, agriculture, and other heavy-duty applications. Understanding its intricacies and addressing potential problems is crucial for maximizing its operational efficiency.
Importance of Troubleshooting for Optimal Equipment Performance
Troubleshooting is a critical aspect of maintaining any heavy machinery, including the New Holland LS180. Regular usage and exposure to challenging working conditions can lead to wear and tear, resulting in performance issues.
By identifying and resolving problems promptly, operators can ensure the longevity and consistent functionality of their equipment.
This guide aims to shed light on seven common problems associated with the New Holland LS180 and provide comprehensive troubleshooting steps to keep your operations running smoothly.
Common New Holland LS180 Problems
Problem 1: Hydraulic System Failures
The hydraulic system is a vital component of the New Holland LS180, responsible for powering various functions, including lifting and tilting the loader arms. Understanding the symptoms, potential causes, and troubleshooting steps for hydraulic system failures is essential for maintaining optimal performance.
1. Symptoms
- Unresponsive Loader Arms: If you notice that the loader arms are slow to respond or fail to move altogether, it could indicate a hydraulic issue.
- Fluid Leaks: Check for any visible hydraulic fluid leaks around the hydraulic lines, connections, or cylinders.
- Strange Noises: Unusual noises, such as whining or grinding sounds during loader arm movements, may suggest a problem within the hydraulic system.
2. Possible Causes
- Low Hydraulic Fluid Levels: Inadequate hydraulic fluid can lead to poor system performance. Check the fluid levels and top up if necessary.
- Contaminated Hydraulic Fluid: Dirt or debris in the hydraulic fluid can cause damage to the system components. Regularly inspect and replace the hydraulic fluid as needed.
- Faulty Hydraulic Hoses or Connections: Leaks can occur due to damaged hoses or loose connections. Inspect hoses for visible damage and tighten any loose connections.
- Malfunctioning Hydraulic Pump: A failing hydraulic pump can result in insufficient pressure for proper loader arm movement.
3. Troubleshooting Steps
- Check Hydraulic Fluid Levels:
- Ensure that the hydraulic fluid is at the recommended level. Refer to the equipment’s manual for specifications.
- Inspect for Leaks:
- Carefully examine the hydraulic lines, connections, and cylinders for any signs of leaks. Address and repair any identified leaks promptly.
- Replace or Filter Hydraulic Fluid:
- If the hydraulic fluid appears contaminated, replace it with a fresh, manufacturer-recommended fluid. Consider adding a high-quality filter to prevent future contamination.
- Inspect and Replace Hydraulic Hoses:
- Thoroughly inspect hydraulic hoses for wear, cuts, or damage. Replace any hoses showing signs of deterioration.
- Test Hydraulic Pump Functionality:
- Test the hydraulic pump for proper functionality. If issues persist, consult with a professional technician to assess and potentially replace the hydraulic pump.
By following these troubleshooting steps, you can address hydraulic system failures promptly, ensuring the New Holland LS180 operates at peak efficiency. Regular maintenance and prompt resolution of hydraulic issues contribute to the overall longevity and reliability of your equipment.
Problem 2: Engine Overheating
Engine overheating is a critical issue that demands immediate attention to prevent potential damage to the New Holland LS180. Recognizing signs of overheating, understanding potential causes, and employing effective troubleshooting techniques are essential for maintaining the engine’s health and overall equipment performance.
1. Signs of Overheating
- Temperature Gauge Spike: A sudden increase in the temperature gauge beyond the normal operating range is a clear indication of engine overheating.
- Steam or Smoke: Visible steam or smoke emanating from the engine compartment suggests excessive heat and potential coolant issues.
- Warning Lights or Alarms: Modern equipment often features warning lights or alarms that illuminate or sound when the engine temperature exceeds safe levels.
2. Potential Causes
- Low Coolant Levels: Inadequate coolant levels can lead to insufficient heat dissipation, causing the engine to overheat.
- Coolant Leaks: Check for coolant leaks around the radiator, hoses, and connections. Leaks can compromise the cooling system’s effectiveness.
- Faulty Thermostat: A malfunctioning thermostat may prevent the proper regulation of coolant flow, contributing to overheating.
- Clogged Radiator: Dirt, debris, or coolant deposits can accumulate in the radiator, impeding the cooling process.
- Failing Water Pump: A malfunctioning water pump can hinder the circulation of coolant through the engine, leading to overheating.
3. Troubleshooting Techniques
- Check Coolant Levels:
- Ensure that the coolant reservoir is filled to the recommended level. Top up the coolant if necessary, using the manufacturer-recommended coolant type.
- Inspect for Coolant Leaks:
- Thoroughly examine the radiator, hoses, and connections for any visible coolant leaks. Address and repair leaks promptly.
- Test and Replace Thermostat:
- Test the thermostat for proper functionality. If it’s faulty, replace it to ensure the regulated flow of coolant.
- Clean the Radiator:
- Remove any debris, dirt, or coolant deposits from the radiator fins. Use a soft brush or compressed air to clean the radiator thoroughly.
- Examine the Water Pump:
- Check the water pump for signs of damage or leaks. If the pump is failing, consider replacing it to restore proper coolant circulation.
- Monitor Fan Operation:
- Ensure that the cooling fan is operating correctly. A malfunctioning fan can contribute to overheating. Repair or replace the fan as needed.
By proactively addressing engine overheating issues through these troubleshooting techniques, operators can safeguard the New Holland LS180’s engine and prevent potential damage. Regular maintenance, including coolant checks and system inspections, is crucial for ensuring the reliable and efficient performance of the equipment.
Problem 3: Electrical Issues
Electrical issues can disrupt the smooth operation of the New Holland LS180, affecting various components and functionalities. Recognizing indications of electrical problems, understanding common causes, and employing a systematic troubleshooting guide are crucial steps in maintaining the electrical integrity of the equipment.
1. Indications of Electrical Problems
- Failure to Start: If the New Holland LS180 fails to start or experiences intermittent starting issues, it may point to electrical issues.
- Dimming Lights: Dimming or flickering lights on the instrument panel or external lighting can indicate electrical instability.
- Inoperative Controls: Non-responsive or erratic behavior of controls, such as the joystick or buttons, may be indicative of electrical issues.
2. Common Causes
- Faulty Battery: A weak or dead battery is a common culprit for electrical problems. Check the battery voltage and connections.
- Corroded or Loose Wiring: Corrosion or loose connections in the wiring can disrupt the electrical flow. Inspect wiring harnesses and connections for signs of damage.
- Defective Alternator: If the alternator is not charging the battery properly, it can lead to electrical issues. Test the alternator output for optimal performance.
- Blown Fuses: Fuses protect electrical circuits from overloads. Check for blown fuses and replace them with the appropriate amperage.
3. Step-by-Step Troubleshooting Guide
- Inspect Battery:
- Check the battery voltage using a multimeter. Charge or replace the battery if voltage is low or if it fails to hold a charge.
- Examine Wiring and Connections:
- Inspect wiring harnesses for any visible damage or signs of corrosion. Ensure all connections are tight and secure.
- Test Alternator Output:
- Use a multimeter to measure the alternator’s output voltage. If the output is below the manufacturer’s specifications, consider replacing the alternator.
- Check Fuses:
- Locate the fuse panel and inspect for blown fuses. Replace any blown fuses with ones of the correct amperage.
- Verify Ground Connections:
- Ensure that all ground connections are clean and secure. Poor grounding can contribute to electrical problems.
- Perform Component Testing:
- Systematically test individual electrical components, such as switches and sensors, to identify any malfunctioning parts.
- Consult Diagnostic Codes (if applicable):
- If the New Holland LS180 is equipped with a diagnostic system, check for error codes to pinpoint specific electrical issues.
By following this step-by-step troubleshooting guide, operators can effectively identify and address electrical issues, ensuring the New Holland LS180 operates reliably. Regular inspections and preventive measures contribute to the longevity of the electrical system and overall equipment performance.
Problem 4: Transmission Troubles
Transmission issues can significantly impede the performance of the New Holland LS180, affecting its ability to maneuver and operate efficiently. Recognizing the signs of transmission problems, understanding the potential causes, and implementing effective troubleshooting recommendations are crucial steps in addressing and resolving these issues.
1. Recognizing Transmission Issues
- Slipping Gears: If you experience erratic or inconsistent gear engagement, it may indicate a slipping transmission.
- Unusual Noises: Grinding, whining, or clunking sounds during gear changes can be indicative of transmission trouble.
- Delayed Shifting: Delays in shifting between gears or hesitation during acceleration are common symptoms of transmission problems.
2. Causes Behind Transmission Problems
- Low Transmission Fluid: Inadequate transmission fluid levels can lead to poor lubrication and overheating, causing transmission issues.
- Contaminated Transmission Fluid: Dirty or contaminated transmission fluid can compromise the efficiency of the transmission system.
- Faulty Solenoids: Malfunctioning solenoids can disrupt the flow of transmission fluid, impacting gear changes.
- Worn Clutch Components: In manual transmissions, worn clutch plates or pressure plates can contribute to transmission problems.
3. Troubleshooting Recommendations
- Check Transmission Fluid Levels:
- Ensure that the transmission fluid is at the correct level. Top up the fluid if needed, using the manufacturer-recommended type.
- Inspect Transmission Fluid Quality:
- Check the condition of the transmission fluid. If it appears dirty or contaminated, consider flushing and replacing it.
- Scan for Transmission Error Codes:
- If the New Holland LS180 is equipped with a diagnostic system, scan for error codes related to the transmission to identify specific issues.
- Examine Solenoids:
- Test the transmission solenoids for proper functionality. Replace any faulty solenoids that are impacting fluid flow.
- Evaluate Clutch Components (for Manual Transmissions):
- Inspect clutch plates and pressure plates for wear. Replace any components that show signs of deterioration.
- Perform a Test Drive:
- Conduct a test drive to observe the transmission’s behavior. Pay attention to gear changes, unusual noises, and any signs of slipping.
- Seek Professional Assistance:
- If troubleshooting steps do not resolve the issue, consult with a professional technician or the equipment’s service department for a more in-depth diagnosis and repair.
By proactively addressing transmission troubles through these troubleshooting recommendations, operators can enhance the overall performance and longevity of the New Holland LS180. Regular transmission fluid maintenance and prompt resolution of issues contribute to a smoother and more reliable operation of the equipment.
Problem 5: Steering System Challenges
A malfunctioning steering system in the New Holland LS180 can pose significant operational challenges and compromise the safety of the equipment. Identifying signs of steering problems, understanding likely causes, and implementing practical troubleshooting steps are essential for maintaining precise control and ensuring a safe working environment.
1. Identifying Steering Problems
- Difficulty Turning: If you experience increased resistance or difficulty in turning the steering wheel, it may indicate a problem in the steering system.
- Uneven Steering Response: Inconsistent or uneven steering response, where the equipment veers to one side unexpectedly, is a clear sign of steering issues.
- Strange Noises: Unusual sounds, such as squeaking or groaning, during steering movements may suggest problems within the steering components.
2. Likely Causes
- Low Power Steering Fluid: Inadequate power steering fluid levels can result in diminished hydraulic assistance, leading to steering difficulties.
- Damaged Steering Components: Wear and tear on steering components, such as tie rods or steering linkage, can impact steering responsiveness.
- Faulty Power Steering Pump: A malfunctioning power steering pump can reduce the hydraulic pressure needed for smooth steering.
- Air in the Power Steering System: Air bubbles in the power steering fluid can hinder proper hydraulic function, causing steering challenges.
3. Practical Troubleshooting Steps
- Check Power Steering Fluid Levels:
- Verify that the power steering fluid is at the recommended level. Top up the fluid if necessary, using the manufacturer-recommended type.
- Inspect for Fluid Leaks:
- Examine the power steering system for any visible leaks around hoses, connections, or the power steering pump. Address and repair any leaks promptly.
- Bleed the Power Steering System:
- If air is suspected in the system, bleed the power steering system to remove air bubbles. Follow the equipment’s manual for the proper bleeding procedure.
- Examine Steering Components:
- Inspect steering components, such as tie rods and steering linkage, for signs of wear or damage. Replace any components showing deterioration.
- Test Power Steering Pump:
- Test the power steering pump for proper functionality. If the pump is faulty, consider replacing it to restore hydraulic pressure.
- Perform a Steering Test:
- Conduct a steering test to observe responsiveness and check for any unusual noises. Ensure that the steering wheel turns smoothly without excessive resistance.
- Consult with a Professional Technician:
- If troubleshooting steps do not resolve the issue, seek the expertise of a professional technician or the equipment’s service department for further diagnosis and repair.
By addressing steering system challenges through these practical troubleshooting steps, operators can maintain precise control and ensure the safe operation of the New Holland LS180. Regular inspections and prompt resolution of steering issues contribute to the overall efficiency and reliability of the equipment.
Problem 6: Fuel System Hurdles
Fuel system issues can significantly impact the performance and efficiency of the New Holland LS180. Recognizing signs of fuel system problems, understanding common causes, and implementing effective troubleshooting tips are essential for ensuring a steady fuel supply and optimal engine function.
1. Signs of Fuel System Issues
- Difficulty Starting the Engine: If the New Holland LS180 experiences challenges in starting or exhibits extended cranking times, it may indicate fuel system issues.
- Reduced Engine Power: A noticeable decrease in engine power or performance can be a sign of insufficient fuel supply.
- Engine Stalling: Unexpected engine stalls during operation may point to disruptions in the fuel system.
2. Common Causes
- Clogged Fuel Filters: Dirt, debris, or contaminants in the fuel can clog the fuel filters, restricting the flow of clean fuel to the engine.
- Fuel Contamination: Contaminated fuel, often containing water or other impurities, can adversely affect the fuel system components and engine performance.
- Faulty Fuel Pump: A malfunctioning fuel pump may not provide adequate fuel pressure, leading to engine issues.
- Air in the Fuel System: Air bubbles in the fuel lines can disrupt the smooth flow of fuel, causing erratic engine behavior.
3. Troubleshooting Tips
- Inspect Fuel Filters:
- Regularly inspect and replace fuel filters according to the manufacturer’s recommended intervals. Clogged filters can be a common source of fuel system issues.
- Check for Fuel Contamination:
- Test the fuel for contamination regularly. If contamination is detected, drain the fuel tank and replace it with clean, quality fuel.
- Test Fuel Pump Functionality:
- Test the fuel pump for proper operation. If the fuel pump is not delivering adequate pressure, consider replacing it.
- Bleed Air from the Fuel System:
- If air is suspected in the fuel system, bleed the air from the lines according to the equipment’s manual to ensure proper fuel flow.
- Inspect Fuel Lines and Connections:
- Examine fuel lines and connections for any signs of leaks or damage. Address and repair any issues to prevent fuel system disruptions.
- Monitor Injector Performance:
- Check the performance of fuel injectors. Dirty or malfunctioning injectors can impact fuel atomization and combustion.
- Consult with a Professional Technician:
- If troubleshooting steps do not resolve the issue, seek the assistance of a professional technician or the equipment’s service department for a more in-depth diagnosis and repair.
By proactively addressing fuel system hurdles through these troubleshooting tips, operators can maintain a reliable fuel supply and ensure the efficient performance of the New Holland LS180. Regular fuel system maintenance contributes to the longevity and overall reliability of the equipment.
Read more: New holland workmaster 70 problems and solutions
Problem 7: Loader Arm Malfunctions
The loader arms are a crucial component of the New Holland LS180, facilitating various tasks in construction and agricultural applications. Recognizing indicators of loader arm problems, understanding potential reasons, and employing a step-by-step troubleshooting process are essential for maintaining optimal functionality and safety.
1. Indicators of Loader Arm Problems
- Unusual Noises: Strange sounds during loader arm movements, such as clunking, grinding, or squeaking, may indicate issues with the loader arms.
- Slow or Inconsistent Movement: If the loader arms exhibit slow or inconsistent movement, it suggests potential problems in the hydraulic system or mechanical components.
- Jerky Movements: Jerky or uneven movements of the loader arms during operation can be a sign of issues with the hydraulic cylinders or control mechanisms.
2. Potential Reasons
- Low Hydraulic Fluid Levels: Inadequate hydraulic fluid can result in insufficient pressure for proper loader arm movement.
- Hydraulic System Contamination: Contaminated hydraulic fluid can lead to damage in the hydraulic system components, affecting loader arm performance.
- Worn Hydraulic Cylinders: Over time, hydraulic cylinders can experience wear, reducing their efficiency and impacting loader arm movements.
- Faulty Control Mechanisms: Issues with control valves, joysticks, or electronic control units can result in erratic loader arm behavior.
3. Step-by-Step Troubleshooting Process
- Check Hydraulic Fluid Levels:
- Ensure that the hydraulic fluid is at the recommended level. Top up the fluid if necessary, using the manufacturer-recommended type.
- Inspect for Hydraulic Fluid Contamination:
- Examine the hydraulic fluid for any signs of contamination. If contamination is detected, replace the fluid and consider adding a high-quality filter.
- Test Hydraulic Cylinders:
- Evaluate the condition of hydraulic cylinders for signs of wear, leaks, or damage. Replace any cylinders showing deterioration.
- Examine Control Mechanisms:
- Inspect control valves, joysticks, and electronic control units for proper functionality. Clean or replace components that are not operating correctly.
- Bleed Air from the Hydraulic System:
- If air is suspected in the hydraulic system, bleed the air according to the equipment’s manual to ensure proper hydraulic fluid flow.
- Perform a Loader Arm Test:
- Conduct a loader arm test to observe movements, checking for smooth and consistent operation. Identify any unusual noises or jerky motions.
- Consult with a Professional Technician:
- If troubleshooting steps do not resolve the issue, seek the expertise of a professional technician or the equipment’s service department for further diagnosis and repair.
By systematically addressing loader arm malfunctions through this troubleshooting process, operators can ensure the reliable and efficient performance of the New Holland LS180. Regular maintenance and prompt resolution of loader arm issues contribute to the overall longevity and safety of the equipment.
Preventive Maintenance Tips
Importance of Regular Maintenance
Regular maintenance is the cornerstone of ensuring the longevity, reliability, and optimal performance of the New Holland LS180. Just like any heavy machinery, this compact skid steer loader requires attention to various components and systems to prevent issues, enhance safety, and minimize costly repairs. Investing time and resources in a proactive maintenance routine not only preserves the equipment’s value but also contributes to a more productive and efficient operation.
Scheduled Checks and Inspections
- Daily Walkaround Inspections:
- Visual Checks: Inspect the New Holland LS180 for any visible damage, leaks, or loose components.
- Fluid Levels: Check engine oil, hydraulic fluid, coolant, and other fluid levels daily.
- Tire Inspection: Examine tires for proper inflation, wear, and damage.
- Regular Fluid Changes:
- Adhere to manufacturer-recommended intervals for changing engine oil, hydraulic fluid, and other essential fluids.
- Filter Replacements:
- Replace air, fuel, and hydraulic filters according to the recommended maintenance schedule to ensure optimal performance.
- Inspect Belts and Chains:
- Regularly check and tighten belts and chains to prevent slippage or breakage.
- Greasing Moving Parts:
- Lubricate pivot points, joints, and other moving parts as per the manufacturer’s guidelines to reduce friction and wear.
- Electrical System Checks:
- Inspect the battery, wiring, and connections regularly for signs of corrosion or wear.
- Cooling System Maintenance:
- Clean radiators and cooling fins to prevent overheating and ensure efficient engine cooling.
Best Practices for Preventing Common Problems
- Follow the Operator’s Manual:
- Adhere to the guidelines and recommendations outlined in the operator’s manual for proper operation and maintenance.
- Operate within Load Limits:
- Avoid overloading the New Holland LS180, as exceeding load limits can lead to stress on components and premature wear.
- Training for Operators:
- Ensure that operators are adequately trained to operate the equipment safely and understand basic maintenance procedures.
- Store Equipment Properly:
- When not in use, store the New Holland LS180 in a dry and sheltered environment to prevent exposure to harsh weather conditions.
- Address Issues Promptly:
- Immediately address any identified issues during routine inspections to prevent small problems from escalating into major issues.
- Use Genuine Parts:
- Always use genuine parts and fluids recommended by the manufacturer to maintain the equipment’s integrity.
- Implement a Preventive Maintenance Schedule:
- Develop and adhere to a regular preventive maintenance schedule, including daily, weekly, monthly, and annual checks.
By incorporating these preventive maintenance tips into your routine, you can proactively safeguard the New Holland LS180 from common problems, extend its lifespan, and ensure consistent, trouble-free performance in various applications. Regular checks and attention to key components are essential for a reliable and efficient skid steer loader operation.
Seeking Professional Help
Knowing When to Call in Experts
While regular maintenance by operators is crucial for keeping the New Holland LS180 in optimal condition, there are instances where calling in professional help becomes essential. Recognizing the signs and situations that warrant expert attention is key to preventing further damage and ensuring the longevity of your equipment.
- Persistent Issues:
- If you encounter persistent problems despite thorough troubleshooting, it’s an indication that a deeper issue may exist. Seeking professional assistance can provide a more comprehensive diagnosis.
- Unusual Noises or Vibrations:
- Unusual sounds or vibrations during equipment operation may signify underlying mechanical issues that require the expertise of a trained technician.
- Major Component Failures:
- In the event of major component failures, such as engine or transmission issues, consulting with professionals ensures that repairs are conducted with precision and using the right parts.
- Complex Repairs:
- Repairs involving complex systems or electronic components may require the specialized knowledge and tools of professional technicians.
Benefits of Professional Maintenance
Engaging professionals for maintenance offers a range of benefits that contribute to the overall health and performance of the New Holland LS180.
- Expertise and Experience:
- Professional technicians possess the expertise and experience to diagnose and address complex issues accurately, reducing downtime and preventing further damage.
- Access to Specialized Tools:
- Professionals have access to specialized tools and equipment necessary for in-depth diagnostics and repairs, ensuring precision and efficiency.
- Use of Genuine Parts:
- Professional maintenance often involves the use of genuine parts recommended by the manufacturer, ensuring compatibility and maintaining the integrity of the equipment.
- Comprehensive Inspections:
- Professional technicians conduct comprehensive inspections, identifying potential issues before they escalate, and recommending preventive measures.
Recommended Service Intervals
To maintain the New Holland LS180 at peak performance, adhere to the manufacturer’s recommended service intervals. These intervals are designed to address specific maintenance needs at various stages of the equipment’s lifecycle.
- Daily Checks:
- Perform daily walkaround inspections to identify visible issues and ensure fluid levels are within the recommended range.
- Weekly Inspections:
- Conduct more detailed weekly inspections, focusing on key components such as belts, chains, and filters.
- Monthly Maintenance:
- Schedule monthly maintenance tasks, including fluid changes, greasing moving parts, and inspecting the cooling system.
- Quarterly Assessments:
- Every quarter, perform a thorough assessment of major systems, checking for wear, leaks, and overall component health.
- Annual Overhauls:
- Annually, consider a comprehensive overhaul that includes inspecting and potentially replacing major components to ensure long-term reliability.
Conclusion
In conclusion, a proactive approach to maintenance, coupled with the timely involvement of professional help, is the key to keeping the New Holland LS180 in prime condition. Regular checks by operators, coupled with the expertise of professional technicians, contribute to equipment longevity, efficiency, and safety.
By understanding when to seek expert assistance and embracing a holistic maintenance strategy, operators can maximize the benefits of their investment in the New Holland LS180, ensuring its continued reliability and performance.