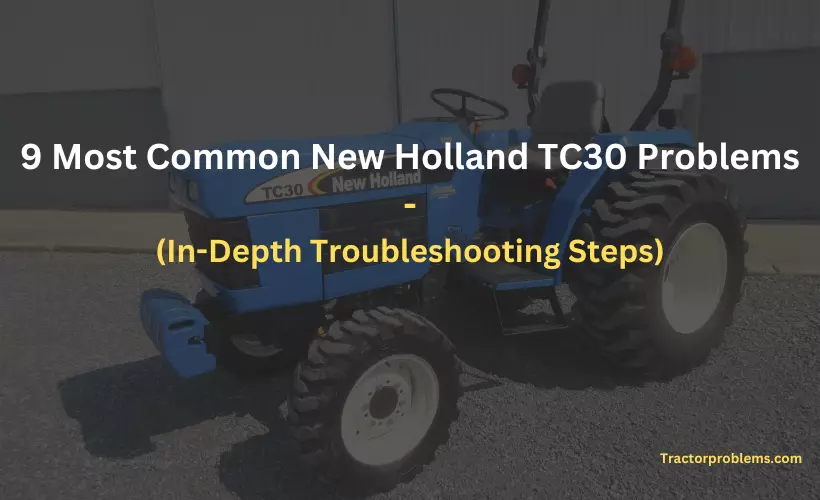
The New Holland TC30 is a compact utility tractor that has gained popularity among farmers and homeowners alike due to its versatility and reliability. With a sturdy build and powerful performance, this tractor model is suitable for various agricultural tasks, landscaping, and light construction work. Its compact size makes it maneuverable in tight spaces, making it a preferred choice for small to medium-sized operations.
As with any mechanical equipment, the New Holland TC30 is not exempt from facing technical issues over time. Recognizing and addressing these common problems is crucial for maintaining the tractor’s peak performance and efficiency. Ignoring minor problems can lead to more significant and costly damages in the long run. Regular troubleshooting and proactive maintenance can extend the tractor’s lifespan and ensure it remains a valuable asset for your operations.
The purpose of this blog post is to equip New Holland TC30 owners with valuable insights into the most prevalent issues that may arise during the tractor’s lifecycle. By providing a comprehensive guide to troubleshooting, we aim to empower tractor owners to handle these problems proactively. With step-by-step instructions and helpful tips, this blog post will enable you to diagnose and resolve issues efficiently, whether you are a seasoned farmer or a first-time tractor owner.
Let’s delve into the nine most common New Holland TC30 problems and the corresponding troubleshooting steps, so you can keep your tractor running smoothly and avoid costly downtime.
1. Electrical System Problems
A. Description of Common Electrical Issues
The electrical system of the New Holland TC30 plays a vital role in powering various components, ensuring smooth operation, and providing reliable performance. However, several common electrical issues can arise over time, causing inconvenience and hampering the tractor’s functionality. Here are some of the typical electrical problems you may encounter:
- Starter Problems: The tractor fails to start or experiences slow cranking when you turn the ignition key. This issue often points to a faulty starter motor or solenoid.
- Battery Troubles: A weak or dead battery can prevent the tractor from starting altogether. Corroded battery terminals or damaged cables may also contribute to this problem.
- Fuse Blows Frequently: If fuses in the electrical system keep blowing, it indicates an underlying issue such as a short circuit or overloaded circuit.
B. Troubleshooting Steps for Each Problem
1. Starter Problems
- Step 1: Inspect Battery Charge: Before suspecting the starter, check the battery voltage with a multimeter. Ensure it has sufficient charge (around 12.6 volts). If the battery is low, charge it and try starting the tractor again.
- Step 2: Check Battery Terminals: Clean the battery terminals from any corrosion using a wire brush. Ensure a secure connection between the battery cables and terminals.
- Step 3: Test Solenoid: If the battery is in good condition but the starter still doesn’t engage, the solenoid might be faulty. Use a multimeter to test the continuity of the solenoid and replace it if necessary.
2. Battery Troubles
- Step 1: Inspect Battery Health: Measure the battery voltage with a multimeter. If the voltage is significantly lower than the recommended level (below 12.0 volts), the battery might be weak or dead and needs replacement.
- Step 2: Check Battery Connections: Ensure the battery terminals are clean and tightly connected. Corroded terminals can disrupt the flow of current and affect the tractor’s ability to start.
- Step 3: Test Charging System: If the battery is continuously draining or not charging properly, inspect the alternator or generator. Use a multimeter to test the charging output and replace the faulty component if necessary.
3. Fuse Blows Frequently
- Step 1: Identify the Circuit: Determine which electrical circuit is causing the fuse to blow by checking the tractor’s manual or using a circuit tester.
- Step 2: Check Wiring: Inspect the wiring harness and connections in the identified circuit for any signs of damage or exposed wires.
- Step 3: Look for Short Circuits: A short circuit can cause excessive current flow, leading to blown fuses. Use a multimeter to check for continuity between wires and ground points. Repair or replace any damaged wiring.
By following these troubleshooting steps, you can address common electrical issues in your New Holland TC30 tractor. However, if the problem persists or you are unsure about performing these tasks, it’s always best to seek assistance from a qualified mechanic or authorized New Holland service center. Proper maintenance and timely repairs will ensure your tractor’s electrical system functions optimally and keeps you productive on the field.
Read Also: 7 Common New Holland Tb100 Problems You Need To Know
2. Hydraulic System Problems
A. Overview of Typical Hydraulic System Malfunctions
The hydraulic system in the New Holland TC30 tractor is essential for operating various attachments, such as loaders and backhoes, and it plays a crucial role in providing smooth and efficient power to hydraulic components. However, like any other system, the hydraulic system can encounter issues that may impact its performance. Here are some common hydraulic problems:
- Hydraulic Leaks: One of the most prevalent issues is hydraulic fluid leaks. Leaks can occur at hose connections, seals, or hydraulic cylinder components, leading to a loss of fluid and reduced system efficiency.
- Poor Hydraulic Performance: If you notice slow or weak hydraulic response, it might be an indication of insufficient hydraulic pressure or a failing hydraulic pump.
- Hydraulic Overheating: Overheating of the hydraulic fluid can occur due to excessive load, a malfunctioning cooler, or a clogged hydraulic filter.
B. Step-by-Step Guide for Diagnosing and Resolving Hydraulic Problems
1. Hydraulic Leaks
- Step 1: Visual Inspection: Start by examining the hydraulic system for any visible leaks. Look for wet spots or puddles of hydraulic fluid around hose connections, fittings, and cylinders.
- Step 2: Tighten Connections: If you find loose connections, tighten them with the appropriate tools. Be cautious not to over-tighten as it may cause damage to the fittings.
- Step 3: Check Hose Condition: Inspect the hydraulic hoses for signs of wear, cracks, or abrasions. Damaged hoses should be replaced promptly.
- Step 4: Inspect Cylinder Seals: Check the hydraulic cylinder seals for signs of wear or damage. Faulty seals should be replaced to prevent leaks.
- Step 5: Verify Hydraulic Fluid Level: Ensure the hydraulic fluid level is within the recommended range. If it’s low, add the appropriate hydraulic fluid as per the manufacturer’s specifications.
2. Poor Hydraulic Performance
- Step 1: Check Hydraulic Fluid Level: Ensure the hydraulic fluid is at the proper level. Low fluid levels can cause weak hydraulic performance.
- Step 2: Inspect Hydraulic Pump: Test the hydraulic pump’s pressure output using a pressure gauge. If the pressure is lower than the specified value, the pump might need replacement or repair.
- Step 3: Check for Clogged Filters: A clogged hydraulic filter can restrict fluid flow and reduce system performance. Inspect the filters and replace them if necessary.
3. Hydraulic Overheating
- Step 1: Monitor Fluid Temperature: Keep an eye on the hydraulic fluid temperature gauge while operating the tractor. If the temperature rises significantly, it might indicate overheating.
- Step 2: Check Hydraulic Cooler: Inspect the hydraulic cooler for debris or dirt accumulation that may hinder airflow. Clean the cooler if necessary.
- Step 3: Verify Load and Usage: Ensure that the tractor’s hydraulic system isn’t being overloaded. Avoid excessive use that might cause overheating.
- Step 4: Inspect Fluid Condition: Contaminated hydraulic fluid can contribute to overheating. Check the fluid condition and replace it if it appears dirty or degraded.
By following these step-by-step troubleshooting guidelines, you can effectively diagnose and address common hydraulic system problems in your New Holland TC30 tractor. It’s essential to perform regular maintenance and address issues promptly to keep the hydraulic system running smoothly and efficiently, enhancing the overall performance of your tractor on the field. If you encounter more complex problems or need expert assistance, don’t hesitate to consult a qualified mechanic or New Holland service center.
Read Also: Uncovering the Truth behind New Holland T8010 Problems
3. Engine Troubles
A. Explanation of Engine-Related Issues
The engine is the heart of the New Holland TC30 tractor, and any problems with it can significantly impact the overall performance and productivity. Engine-related issues may arise due to various factors, and it’s essential to identify and address them promptly to avoid further damage. Here are some common engine problems you might encounter:
- Overheating: Engine overheating can result from coolant leaks, a malfunctioning cooling system, clogged radiator, or a faulty thermostat.
- Low Power: If you notice a significant decrease in engine power, it might be due to fuel system problems, air filter issues, or engine wear.
- Excessive Smoke: Excessive smoke of different colors (black, blue, or white) can indicate issues with the fuel system, engine oil, or engine compression.
B. Detailed Troubleshooting Process for Engine Problems
1. Overheating
- Step 1: Check Coolant Level: Verify the coolant level in the radiator and the coolant reservoir. If it’s low, top it up to the recommended level with the appropriate coolant mixture.
- Step 2: Inspect for Leaks: Look for any visible coolant leaks around the engine, hoses, and radiator. Repair or replace any damaged components causing leaks.
- Step 3: Test Thermostat: A faulty thermostat can prevent proper coolant circulation. Test the thermostat or replace it if necessary.
- Step 4: Check Radiator and Cooling Fan: Inspect the radiator for clogs or damage that may obstruct airflow. Ensure the cooling fan is functioning correctly.
- Step 5: Flush Cooling System: If the cooling system appears contaminated or clogged, perform a cooling system flush and replace the coolant.
2. Low Power
- Step 1: Check Air Filter: A clogged or dirty air filter can restrict airflow to the engine, leading to reduced power. Inspect the air filter and replace it if it’s dirty.
- Step 2: Inspect Fuel Filter: A clogged fuel filter can impede fuel flow to the engine. Check the fuel filter and replace it if needed.
- Step 3: Verify Fuel Quality: Ensure you are using clean and high-quality fuel. Contaminated or old fuel can cause engine performance issues.
- Step 4: Test Fuel Injectors: Faulty fuel injectors can result in uneven fuel distribution to the cylinders. Test and clean or replace the injectors as required.
3. Excessive Smoke
- Step 1: Identify Smoke Color: Different smoke colors indicate various issues. Black smoke indicates excessive fuel, blue smoke suggests oil burning, and white smoke may indicate coolant entering the combustion chamber.
- Step 2: Check Air Filter and Fuel Quality: As mentioned earlier, a dirty air filter or poor fuel quality can contribute to smoke issues. Address these problems first.
- Step 3: Inspect Turbocharger (if applicable): If your tractor has a turbocharger, check for leaks or malfunctions that could cause smoke.
- Step 4: Compression Test: Perform a compression test to check the engine’s internal condition. Low compression can lead to smoke problems.
- Step 5: Inspect PCV System (for blue smoke): A faulty Positive Crankcase Ventilation (PCV) system can cause oil to be burned in the engine. Inspect and repair as necessary.
By following this detailed troubleshooting process for engine problems, you can diagnose and resolve issues with your New Holland TC30 tractor’s engine. Regular maintenance and timely repairs are crucial to ensure optimal engine performance and avoid costly breakdowns. If you encounter complex issues or need expert assistance, consult a qualified mechanic or an authorized New Holland service center for professional support.
Read Also: Unveiling the New Holland T6 165 Problems: Solutions Revealed
4. Transmission and Gear Shift Problems
A. Discussion of Transmission-Related Challenges
The transmission system of the New Holland TC30 tractor is responsible for transferring power from the engine to the wheels, allowing the tractor to move at different speeds and handle various tasks. However, transmission-related challenges can arise, affecting the tractor’s performance and maneuverability. Here are some common transmission and gear shift problems you may encounter:
- Slipping Gears: If you experience gears slipping or disengaging while operating the tractor, it may be due to issues with the clutch, transmission fluid, or internal components.
- Difficulty Shifting: Difficulty in shifting gears, such as hard or jerky gear changes, can occur because of problems with the clutch, shift linkage, or the transmission itself.
- Noisy Transmission: Unusual noises during gear shifts, such as grinding or whining sounds, may indicate internal wear or issues with synchronizers.
B. Troubleshooting Techniques for Resolving Transmission and Gear Shift Issues
1. Slipping Gears
- Step 1: Check Clutch Adjustment: Inspect the clutch adjustment and ensure it’s within the manufacturer’s recommended specifications. If it’s out of adjustment, adjust it properly.
- Step 2: Check Transmission Fluid: Ensure the transmission has the correct type and level of fluid. Low or contaminated fluid can lead to gear slippage.
- Step 3: Inspect Transmission Components: If the gear slipping persists, the problem might lie within the transmission. Consult a professional mechanic or authorized service center for a thorough inspection and possible repairs.
2. Difficulty Shifting
- Step 1: Verify Clutch Operation: Ensure the clutch is engaging and disengaging correctly. If the clutch is not functioning correctly, it can make gear shifting difficult.
- Step 2: Inspect Shift Linkage: Check the shift linkage for any loose or damaged components. Properly adjust or replace any worn parts.
- Step 3: Check Transmission Fluid: As with slipping gears, ensure the transmission fluid is at the proper level and in good condition.
- Step 4: Check Synchronizers (if applicable): If your tractor has synchronizers, they might be worn or damaged, causing difficulty in shifting. Consult a professional for inspection and potential replacement.
3. Noisy Transmission
- Step 1: Check Transmission Fluid: Verify the transmission fluid level and condition. Low or contaminated fluid can contribute to unusual noises.
- Step 2: Inspect Gear Teeth: Inspect the gear teeth for signs of wear or damage. Worn gear teeth can create grinding noises during gear shifts.
- Step 3: Inspect Synchronizers (if applicable): Synchronizers ensure smooth gear engagement. Worn synchronizers can lead to gear grinding noises.
- Step 4: Professional Inspection: If the noise persists despite basic checks, it’s best to seek assistance from a qualified mechanic or authorized New Holland service center for a thorough diagnosis and resolution.
Remember, the transmission is a critical component of your New Holland TC30 tractor, and any issues should be addressed promptly to prevent further damage. Regular maintenance and proper use will help ensure a smooth and reliable transmission, enhancing the overall performance and longevity of your tractor. When in doubt or facing complex problems, always seek help from expert mechanics or authorized service centers.
Read Also: 5 Troubling New Holland L218 Problems You Need to Know
5. PTO (Power Take-Off) Issues
A. Overview of PTO-Related Problems
The Power Take-Off (PTO) system in the New Holland TC30 tractor is essential for transferring power from the engine to various implements, such as mowers, tillers, and balers. PTO-related problems can hinder the operation of these attachments and impact overall productivity. Here are some common PTO issues you may encounter:
- Failure to Engage: The PTO fails to engage when you activate the PTO switch or lever, preventing the attachment from operating.
- Strange Noises: Unusual noises, such as grinding, squealing, or rattling sounds, may occur when the PTO is engaged, indicating possible mechanical problems.
- PTO Shaft Vibrations: Excessive vibrations in the PTO shaft during operation may signal misalignment or worn components.
B. Steps to Troubleshoot and Repair PTO Problems Effectively
1. Failure to Engage
- Step 1: Check Safety Interlocks: Many tractors have safety interlocks that prevent the PTO from engaging if certain conditions are not met. Ensure all safety switches are functioning correctly, such as seat switch, clutch switch, and brake switch.
- Step 2: Inspect PTO Switch and Wiring: Examine the PTO switch and its wiring for any signs of damage or loose connections. Repair or replace as needed.
- Step 3: Verify PTO Clutch Operation: Check the PTO clutch assembly for proper engagement and disengagement. Adjust or replace the clutch if necessary.
- Step 4: Inspect PTO Shaft: Examine the PTO shaft for any obstructions or debris that might prevent smooth engagement. Clean and lubricate the shaft as needed.
2. Strange Noises
- Step 1: Check PTO Shaft and Bearings: Inspect the PTO shaft and its bearings for signs of wear or damage. Replace any worn or faulty components.
- Step 2: Examine PTO Clutch and Pulley: Inspect the PTO clutch and pulley for wear or misalignment. Correct any issues that might cause unusual noises.
- Step 3: Check for Foreign Objects: Sometimes, foreign objects or debris can get caught in the PTO assembly, causing strange noises. Remove any obstructions and clean the area.
- Step 4: Lubricate Moving Parts: Proper lubrication of the PTO components can reduce friction and noise. Apply the recommended lubricant to moving parts.
3. PTO Shaft Vibrations
- Step 1: Check PTO Shaft Alignment: Verify that the PTO shaft is correctly aligned with the tractor’s PTO output and the implement’s input shaft. Misalignment can cause excessive vibrations.
- Step 2: Inspect PTO Shaft Guards: Ensure the PTO shaft guards are properly installed and not damaged. Damaged guards should be replaced immediately.
- Step 3: Check PTO Shaft Balancing: If vibrations persist, have the PTO shaft balanced by a professional to eliminate any imbalances.
- Step 4: Inspect Implement Components: Vibrations can also be caused by issues with the attached implement. Examine the implement’s driveline and components for wear or damage.
By following these troubleshooting steps, you can effectively diagnose and address common PTO (Power Take-Off) problems in your New Holland TC30 tractor. Regular maintenance and proper use of the PTO system will enhance its performance and ensure seamless operation of various implements. If you encounter complex issues or need expert assistance, consult a qualified mechanic or an authorized New Holland service center for professional support.
Read Also: Fix Your New Holland 273 Baler Problems Today: Easy Solutions
6. Steering and Braking Troubles
A. Description of Common Steering and Braking Problems
The steering and braking systems are critical for the safe operation of the New Holland TC30 tractor. Any issues with these systems can pose a safety risk and hinder the tractor’s maneuverability. Here are some common steering and braking problems you may encounter:
- Steering Difficulties: Difficulty in steering, such as stiff or unresponsive steering, can be caused by problems with the steering linkage, hydraulic system, or worn-out components.
- Uneven Braking: Uneven or inconsistent braking can be due to brake system issues, such as worn brake pads, air in the brake lines, or improper brake adjustment.
- Brake Noise: Unusual noises, such as squealing or grinding sounds when applying the brakes, may indicate brake component wear or improper brake system operation.
B. Troubleshooting Strategies to Address Steering and Braking Issues
1. Steering Difficulties
- Step 1: Check Power Steering Fluid: Ensure the power steering fluid is at the recommended level. Low fluid can cause stiff steering.
- Step 2: Inspect Steering Linkage: Examine the steering linkage, including tie rods and ball joints, for wear or damage. Replace any worn components.
- Step 3: Check Hydraulic System: If your tractor has a hydraulic steering system, inspect it for leaks or malfunctions. Repair or replace faulty components.
- Step 4: Lubricate Steering Components: Proper lubrication of steering components can improve their operation. Apply the recommended lubricant to pivot points and moving parts.
2. Uneven Braking
- Step 1: Check Brake Fluid Level: Verify the brake fluid level in the master cylinder reservoir. If it’s low, top it up with the specified brake fluid.
- Step 2: Inspect Brake Pads and Drums: Examine the brake pads and drums for wear. Worn brake pads or unevenly worn drums should be replaced.
- Step 3: Bleed Brake Lines: If there is air in the brake lines, it can cause uneven braking. Bleed the brake lines to remove air and ensure proper brake function.
- Step 4: Adjust Brakes: If your tractor has adjustable brakes, follow the manufacturer’s guidelines to adjust them properly.
3. Brake Noise
- Step 1: Check Brake Pads and Drums: Inspect the brake pads and drums for signs of wear or damage. Replace any worn or damaged components.
- Step 2: Clean Brake Components: Sometimes, brake noise can be caused by debris or dirt on the brake components. Clean the brakes and ensure they are free from contaminants.
- Step 3: Use High-Quality Brake Pads: Using high-quality, OEM-recommended brake pads can reduce noise and improve braking performance.
- Step 4: Professional Inspection: If the brake noise persists despite basic checks, consult a qualified mechanic or authorized New Holland service center for a thorough diagnosis and resolution.
By following these troubleshooting strategies, you can effectively diagnose and address common steering and braking problems in your New Holland TC30 tractor. Regular maintenance and prompt resolution of issues will ensure safe and reliable steering and braking performance. If you encounter complex problems or need expert assistance, don’t hesitate to consult a qualified mechanic or an authorized New Holland service center for professional support.
Read More: Troubleshooting New Holland 311 Baler Problems: Expert Solutions
7. Cooling System Problems
A. Explanation of Cooling System Malfunctions
The cooling system in the New Holland TC30 tractor is responsible for maintaining the engine’s temperature within a safe operating range. It dissipates excess heat generated during engine operation to prevent overheating. However, several cooling system malfunctions can occur, compromising the engine’s performance and potentially causing severe damage. Here are some common cooling system problems you may encounter:
- Coolant Leaks: Coolant leaks can occur due to damaged hoses, radiator, water pump, or a failing gasket, leading to a loss of coolant and reduced cooling efficiency.
- Overheating: Overheating of the engine can be caused by low coolant levels, a malfunctioning thermostat, a clogged radiator, or a faulty water pump.
B. How to Diagnose and Fix Cooling System Problems
1. Coolant Leaks
- Step 1: Inspect Coolant Reservoir: Check the coolant reservoir for any visible leaks or signs of coolant seepage. If you notice coolant on the ground beneath the tractor, there might be a leak.
- Step 2: Examine Hoses and Connections: Inspect all coolant hoses and their connections for damage, cracks, or loose fittings. Replace any faulty hoses or tighten connections as needed.
- Step 3: Inspect Radiator and Water Pump: Check the radiator and water pump for leaks or signs of corrosion. A malfunctioning water pump might also cause leaks.
- Step 4: Pressure Test the Cooling System: Perform a pressure test on the cooling system to identify hidden leaks. This test involves using a pressure tester to pressurize the system and pinpoint the source of leaks.
2. Overheating
- Step 1: Verify Coolant Level: Ensure the coolant level in the radiator and coolant reservoir is within the recommended range. If it’s low, top it up with the appropriate coolant mixture.
- Step 2: Check Thermostat Operation: A faulty thermostat can cause the engine to overheat. Test the thermostat or replace it if necessary.
- Step 3: Inspect Radiator for Clogs: Examine the radiator for debris, dirt, or clogs that may obstruct airflow. Clean the radiator thoroughly if necessary.
- Step 4: Check the Water Pump: Ensure the water pump is functioning correctly and circulating coolant throughout the cooling system. Replace the water pump if it’s faulty.
- Step 5: Test Radiator Cap: The radiator cap helps maintain proper pressure in the cooling system. Test the cap’s pressure relief valve and replace it if needed.
- Step 6: Flush the Cooling System: If the cooling system appears contaminated or clogged, perform a cooling system flush and replace the coolant.
By following these steps, you can effectively diagnose and fix cooling system problems in your New Holland TC30 tractor. Regular maintenance, such as checking coolant levels and inspecting for leaks, is crucial to ensure the cooling system’s proper operation. Addressing cooling system issues promptly will help prevent engine overheating and extend the life of your tractor. If you encounter complex problems or need expert assistance, consult a qualified mechanic or an authorized New Holland service center for professional support.
Read More: Troubleshooting Guide for New Holland 313 Discbine Problems
8. Fuel System Issues
A. Overview of Fuel System Challenges
The fuel system in the New Holland TC30 tractor is responsible for delivering clean and consistent fuel to the engine for combustion. Various fuel system challenges can arise over time, affecting the tractor’s performance and efficiency. Here are some common fuel system problems you may encounter:
- Fuel Leaks: Fuel leaks can occur at various points in the fuel system, such as fuel lines, filters, or the fuel tank, leading to fuel wastage and potential safety hazards.
- Clogged Fuel Filters: Clogged fuel filters can restrict fuel flow to the engine, causing reduced power and engine performance.
- Contaminated Fuel: The presence of water, dirt, or other contaminants in the fuel can cause engine misfires, rough idling, and poor fuel efficiency.
B. Troubleshooting Tips for Resolving Fuel System Issues
1. Fuel Leaks
- Step 1: Visual Inspection: Perform a visual inspection of the fuel system components, including fuel lines, fuel filters, and the fuel tank, to identify any visible signs of fuel leaks.
- Step 2: Tighten Connections: If you spot any loose connections or fittings, tighten them securely. Be careful not to overtighten, as it may damage the components.
- Step 3: Inspect Fuel Lines: Check the fuel lines for cracks, wear, or damage. Replace any damaged fuel lines promptly.
- Step 4: Verify Fuel Tank Seal: Ensure the fuel tank has a tight seal to prevent leaks. Replace the fuel tank cap if it’s worn or damaged.
2. Clogged Fuel Filters
- Step 1: Check Fuel Filter Maintenance Schedule: Refer to the tractor’s manual for the recommended fuel filter replacement schedule. Regularly changing fuel filters can prevent clogging.
- Step 2: Replace Fuel Filters: If you suspect a clogged fuel filter, replace it with a new, OEM-recommended filter. Follow the manufacturer’s guidelines for proper installation.
- Step 3: Inspect Fuel Quality: Contaminated fuel can contribute to clogged filters. Ensure you are using clean and high-quality fuel.
- Step 4: Clean Fuel Tank: If there is excessive sediment or debris in the fuel tank, consider cleaning it thoroughly to prevent further filter clogging.
3. Contaminated Fuel
- Step 1: Drain Fuel Tank: If you suspect water or dirt in the fuel, drain the fuel tank completely and dispose of the contaminated fuel safely.
- Step 2: Replace Fuel Filters: After draining the tank, replace the fuel filters to prevent the contaminants from entering the engine.
- Step 3: Refill with Clean Fuel: Fill the fuel tank with clean, fresh fuel from a reputable source to avoid future fuel contamination.
- Step 4: Use Fuel Additives: Fuel additives designed to remove water and contaminants can be used to improve fuel quality and prevent future issues.
By following these troubleshooting tips, you can effectively diagnose and resolve fuel system issues in your New Holland TC30 tractor. Regular maintenance, such as replacing fuel filters and using clean fuel, is essential to ensure the proper functioning of the fuel system and maximize engine performance. If you encounter complex problems or need expert assistance, consult a qualified mechanic or an authorized New Holland service center for professional support.
Read More: New Holland T7060 Problems Resolve with Expert Tips
Maintenance and Preventive Care
A. Emphasizing the Importance of Regular Maintenance for TC30 Tractors
Proper maintenance is the cornerstone of keeping your New Holland TC30 tractor operating at its best. Regular maintenance not only ensures optimal performance but also helps prevent costly breakdowns and extends the tractor’s lifespan. As an expert mechanic, I cannot stress enough how vital it is to incorporate a consistent maintenance routine into your tractor care. By dedicating time and attention to your TC30, you’ll reap the rewards of a reliable and productive machine for years to come.
B. Essential Maintenance Tasks to Avoid Common Problems and Prolong the Tractor’s Lifespan
1. Regularly Check Fluid Levels
Regularly inspect and top up essential fluids, such as engine oil, coolant, hydraulic fluid, and brake fluid, to ensure proper lubrication and cooling. Low fluid levels can lead to overheating, reduced performance, and potential damage.
2. Change Engine Oil and Filters
Frequent oil and filter changes are crucial for keeping the engine running smoothly and protecting internal components from wear. Follow the manufacturer’s guidelines for oil change intervals and always use high-quality filters.
3. Inspect and Replace Air Filters
Clean air filters promote proper air intake and combustion, enhancing engine performance and fuel efficiency. Regularly inspect and clean or replace air filters as needed to prevent debris from entering the engine.
4. Check and Adjust Belts
Inspect the belts in the tractor’s engine and auxiliary systems, such as the alternator and water pump. Adjust or replace any loose or worn belts to maintain proper tension and prevent failures.
5. Lubricate Moving Parts
Proper lubrication of moving parts, such as steering components, PTO shaft, and linkages, reduces friction and wear. Use the recommended lubricants and grease points as per the manufacturer’s instructions.
6. Test and Maintain Batteries
Check the battery regularly for corrosion, clean the terminals, and ensure proper connections. Test the battery voltage and charge as needed to avoid starting issues.
7. Inspect and Rotate Tires
Inspect tire condition and pressure regularly. Rotate the tires periodically to ensure even wear and extend their lifespan.
8. Maintain the Cooling System
Flush and replace the coolant according to the manufacturer’s recommendations. Inspect the radiator, water pump, and hoses for leaks or damage.
9. Check and Adjust Brakes
Regularly inspect and adjust the brake system to ensure even braking and safe operation. Replace worn brake pads and components as needed.
10. Clean the Tractor
Keep the tractor clean and free from debris, especially around engine vents, air intakes, and cooling components. A clean tractor is less prone to overheating and component damage.
11. Follow Service Intervals
Adhere to the tractor’s service intervals as outlined in the manual. Scheduled maintenance helps detect potential issues early and keeps the tractor in top condition.
12. Store Properly
When not in use, store the tractor in a dry and sheltered area to protect it from the elements. Proper storage minimizes rust and corrosion.
By diligently performing these essential maintenance tasks, you’ll ensure the longevity and reliability of your New Holland TC30 tractor. Don’t overlook preventive care – it’s the key to maximizing your tractor’s performance and maintaining its value over time. Remember, investing in maintenance now saves you from costly repairs and downtime in the future. If you have any uncertainties or encounter complex issues, consult a qualified mechanic or an authorized New Holland service center for professional assistance. Happy farming!
Read More: New Holland Tc40 Problems Troubleshooting Tips & Advice
Conclusion
In conclusion, the New Holland TC30 tractor is a reliable and versatile machine, capable of handling various tasks on the field. However, like any mechanical equipment, it is prone to encountering problems over time. As an expert mechanic, I’ve highlighted some of the most common issues faced by TC30 owners and provided detailed troubleshooting and repair tips for each category.
From electrical system problems to engine, hydraulic, transmission, PTO, steering, braking, cooling system, and fuel system issues, I’ve covered a wide range of potential challenges. Regular maintenance and preventive care are essential to keep your TC30 tractor in peak condition and extend its lifespan.
By emphasizing the importance of regular maintenance, you can avoid many of these common problems and ensure optimal performance. Follow the manufacturer’s guidelines for maintenance tasks, such as fluid checks, oil changes, air filter replacements, and belt adjustments. Pay attention to the cooling system, fuel system, and brake system to prevent potential issues from escalating.
Remember, your TC30 tractor is an investment, and taking care of it will pay off in the long run. A well-maintained tractor not only performs better but also saves you from unexpected breakdowns and costly repairs.
If you ever encounter complex problems or need expert assistance, don’t hesitate to seek help from qualified mechanics or authorized New Holland service centers. Their expertise and knowledge will ensure your tractor receives the best care and attention.
In conclusion, with proper maintenance, attention to potential issues, and timely repairs, your New Holland TC30 tractor will serve you faithfully for many productive years ahead. Happy farming and may your TC30 always be in top-notch condition!